Skip to content

Category: Uncategorized

[Powershell] Create Microsoft 365 admin account on all managed tenants

I received a question from a customer asking me for a way to create MFA-enabled administrator accounts on all Microsoft 365 tenants managed through the Partner portal, without having to manually go to each tenant and creating them. To solve this, I threw together a quick script that imports a .CSV file containing the DisplayName, UserPrincipalName and Password and then goes through every managed tenant to create the accounts and enables MFA on the newly created accounts.

As an extra bonus, I’ve also provided a script that could be used to remove the accounts on all managed tenants.

Enjoy!

Account Creation

<#
.Description
	This script is used for creating (multiple) Microsoft 365 tenant administrator accounts for all tenants managed by your MSP.
	Current Version: 1.1
	
	Version History:
   ---------------- 
   v1.0: First release.
   v1.1: Fixed a bug that caused trouble when adding roles.
   
	By: Stefan van Bruggen

#>


# Connect to Microsoft 365 using your partner account credentials.

Connect-MsolService

# Get managed tenant IDs and prefixes.

Get-MsolPartnerContract -All | ForEach {
    $TenantPrefix = [string]$_.DefaultDomainName
    $TenantId = [string]$_.TenantId.Guid
      
		# Define administrator roles to be granted to the user.
      
		$Roles = "Authentication Administrator","Azure Information Protection Administrator","Company Administrator","Conditional Access Administrator","Directory Readers","Directory Synchronization Accounts","Directory Writers","Exchange Service Administrator","Helpdesk Administrator","Hybrid Identity Administrator","Intune Service Administrator","Kaizala Administrator","License Administrator","Message Center Privacy Reader","Message Center Reader","Partner Tier1 Support","Partner Tier2 Support","Password Administrator","Privileged Authentication Administrator","Privileged Role Administrator","Reports Reader","Service Support Administrator","SharePoint Service Administrator","Teams Communications Administrator","Teams Communications Support Engineer","Teams Communications Support Specialist","Teams Service Administrator","User Account Administrator"
    
		# Import users from .csv and create new user account, the .csv should have the following fields: DisplayName,UserPrincipalName,Password
      
		Import-Csv .\users.csv | ForEach {
        $newUPN = $_.UserPrincipalName + "@" + $TenantPrefix
        $newUPN = [string]$newUPN
        New-MsolUser -DisplayName $_.DisplayName -UserPrincipalName $newUPN -Password $_.Password -ForceChangePassword:$true -PasswordNeverExpires:$true -TenantId $TenantId 
        
        # Add newly created user account to previously defined administrator roles

        ForEach($role in $roles){
            Add-MsolRoleMember -TenantId $TenantId -RoleName $role -RoleMemberEmailAddress $newUPN
      }
    
    }  
      
      # Set required variables for MFA.
      
      $st = New-Object -TypeName Microsoft.Online.Administration.StrongAuthenticationRequirement
      $st.RelyingParty = "*"
      $st.State = "Enabled"
      $sta = @($st)
      
      # Enable MFA.
      
      Set-MsolUser -TenantId $TenantId -UserPrincipalName $newUPN -StrongAuthenticationRequirements $sta
}

Account Removal

<#
.Description
	This script is used for removing (multiple) Microsoft 365 tenant administrator accounts for all tenants managed by your MSP.
	Current Version: 1.0
   
	By: Stefan van Bruggen, Open ICT
		s.vanbruggen@open-ict.nl

#>


# Connect to Microsoft 365 using your partner account credentials.

Connect-MsolService

# Get managed tenant IDs and prefixes.

Get-MsolPartnerContract -All | ForEach {
    $TenantPrefix = [string]$_.DefaultDomainName
    $TenantId = [string]$_.TenantId.Guid
	
# Import list of users that need to be removed from .csv and remove the accounts, the .csv should have the following fields: UserPrincipalName
	
	Import-Csv .\delete-users.csv | ForEach {
        $UPN = $_.UserPrincipalName + "@" + $TenantPrefix
        $UPN = [string]$UPN
        Remove-MsolUser -UserPrincipalName $UPN -TenantId $TenantId -Force
    }
	
}

[Fixed] Adobe Reader DC High CPU usage

After updating Adobe Reader DC on our XenApp 7.15 environment we started seeing the acrord32.exe generating a high amount of CPU usage, causing performance issues for the end-users.

A quick fix was to kill all the acrord32.exe processes that were stuck running in the background, but we couldn’t reproduce the issue with a test account so troubleshooting this turned out to be a bit of a hassle.

It turned out that when starting Adobe Reader, it tries to find the following registry key:
[HKCU\SOFTWARE\Microsoft\Windows\CurrentVersion\Themes\Personalize]

We were able to confirm this with Sysinternals’ process monitor, in this case the problem didn’t occur because Adobe was able to find the registry key:

If this key doesn’t exist, the process will be stuck in the background using up to 25% CPU per instance.

We created a new action in WEM and pushed the registry key to our users, this solved the problem.

This issue occurs in the following versions of Adobe Reader DC:
2019.021.20047
2019.021.20048

[Exchange 2010] Autodiscovery issues

The Problem

One of our customers was having trouble with autodiscovery not functioning on one of their Exchange 2010 CAS-servers. I was asked to take a look at it and one of the errors in the eventlog stood out in particular:

Could not load file or assembly ‘Microsoft.Exchange.Security, Version=14.0.0.0, Culture=neutral, PublicKeyToken=31bf3856ad364e35’ or one of its dependencies. The system cannot find the file specified. (C:\Program Files\Microsoft\Exchange Server\V14\ClientAccess\Autodiscover\web.config line 940) 

Now, let’s open the web.config file mentioned in the error message. You will most likely see a whole bunch of file:///%ExchangeInstallDir%, and this is exactly what the problem is. In some cases, Exchange is unable to find the installation path using this variable and luckily the fix for this is quite easy.

The Fix

Fire up your favourite text editor, and do a Find&Replace on file:///%ExchangeInstallDir%bin and replace it with file:///C:\Program Files\Microsoft\Exchange Server\V14\bin\ or whatever your installation directory is.

Before:

After:

Try opening the autodiscovery.xml again, et voila! Problem solved.

[Server 2016] 70-740 exam (MCSA 2016)

So, after endless delays and procrastination I finally started the path to getting my MCSA certification. (I know, about time after working in IT for almost 9 years..)

Today, I passed the new 70-740 Installation, Storage, and Compute with Windows Server 2016 exam!

It wasn’t easy, the exams for MCSA 2016 just got out of beta so there is an extreme lack of study material available. If you are planning to take this exam soon, I can recommend using the following resources:

  • Exam Ref 70-740 Installation, Storage and Compute with Windows Server 2016 by Craig Zacker (I used the eBook)
  • Pluralsight video courses by Greg Shields

And of course some hands-on experience if possible.

The exam itself has a lot of focus on Hyper-V configuration and Failover Clustering, in my case about 75% of the questions were about these subjects.

All in all, I appreciated that the exam focused on plausible scenario’s instead of knowing dry facts and PowerShell commands. Do not take this exam lightly though, because it is definitely not easy.

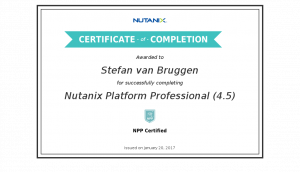
[Certifications] Nutanix Platform Professional

There we go! Nailed the NPP exam last friday.

The exam itself was pretty good, most questions were relevant to real life situations instead of the usual stuff like “Our product is the best, please mark the answer that says we are the best”.

The only downside is that the training for this exam is not nearly enough, you definitely need some experience working with Nutanix to be able to achieve a high enough score to get the certification.

Anyway, onwards to the next couple of certs: Windows Server 2016!

Stefan van Bruggen - 2019